


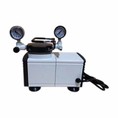
Hey there! As a supplier of Oil-free Vacuum Pumps, I often get asked about how to calibrate these nifty machines. Calibration is super important to ensure that your pump is working at its best, giving you accurate and reliable performance. So, let's dive right in and talk about how you can calibrate an Oil-free Vacuum Pump.
Why Calibration Matters
First off, why should you even bother calibrating your Oil-free Vacuum Pump? Well, over time, the performance of the pump can drift due to various factors like wear and tear, changes in environmental conditions, or just normal usage. Calibration helps to correct these drifts and ensures that the pump is delivering the right level of vacuum. This is crucial, especially in applications where precision is key, like in a laboratory setting when using a Microbial Limit Test Holder.


Tools You'll Need
Before you start the calibration process, you'll need to gather a few tools. You'll need a reliable vacuum gauge. This is your main tool for measuring the vacuum level. Make sure it's been calibrated itself recently to get accurate readings. You'll also need some basic hand tools like screwdrivers and wrenches, depending on the design of your pump. And it's a good idea to have a clean, dry cloth handy to wipe down any parts.
Pre-Calibration Checks
Before you actually start the calibration, there are a few checks you should do. First, inspect the pump for any visible damage. Look for cracks, leaks, or loose parts. If you find any, it's a good idea to fix them before proceeding with the calibration. Next, check the power supply. Make sure the pump is getting the right voltage and that the electrical connections are secure. Also, check the air intake and exhaust ports. Make sure they're not blocked or restricted in any way.
Step-by-Step Calibration Process
Now, let's get into the actual calibration process. Here's a step-by-step guide:
- Set up the vacuum gauge: Connect the vacuum gauge to the pump. Make sure the connection is tight and there are no leaks. You can use a small amount of vacuum grease to seal the connection if needed.
- Power on the pump: Turn on the pump and let it run for a few minutes to reach a stable operating condition. This allows the pump to warm up and get into its normal working mode.
- Measure the initial vacuum level: Use the vacuum gauge to measure the vacuum level. Write down this reading. This is your starting point.
- Adjust the vacuum level: Most Oil-free Vacuum Pumps have an adjustment mechanism. This could be a screw, a knob, or a valve. Use the appropriate tool to make small adjustments to the vacuum level. As you make adjustments, keep an eye on the vacuum gauge. Make small changes at a time and wait a few seconds between each adjustment to let the pump stabilize.
- Check the target vacuum level: If you know the target vacuum level for your application, keep adjusting until you reach that level. If you're not sure, refer to the pump's manual or consult with the manufacturer.
- Verify the calibration: Once you think you've reached the correct vacuum level, turn off the pump and let it sit for a few minutes. Then, turn it on again and re-measure the vacuum level. If the reading is within an acceptable range of your target level, your calibration is successful. If not, make further adjustments and repeat the verification process.
Common Calibration Issues and Solutions
Sometimes, you might run into some issues during the calibration process. Here are a few common problems and how to solve them:
- Inaccurate vacuum readings: If the vacuum gauge is giving inconsistent or inaccurate readings, it could be due to a problem with the gauge itself. Check the gauge for damage or calibration issues. You might need to recalibrate or replace the gauge.
- Difficulty adjusting the vacuum level: If you're having trouble adjusting the vacuum level, it could be because the adjustment mechanism is stuck or damaged. Try cleaning the mechanism with a clean cloth and some lubricant. If that doesn't work, you might need to replace the adjustment part.
- Leaking connections: If you notice a leak in the connections between the pump and the vacuum gauge, check the seals and connections. Tighten any loose connections and use some vacuum grease to seal any gaps.
Maintenance Tips for Calibrated Pumps
Once you've successfully calibrated your Oil-free Vacuum Pump, it's important to keep it in good condition. Here are some maintenance tips:
- Regular cleaning: Clean the pump regularly to remove any dirt, dust, or debris. Use a clean, dry cloth to wipe down the exterior and the air intake and exhaust ports.
- Lubrication: Some pumps might require lubrication of certain parts. Check the pump's manual for specific lubrication requirements and follow them.
- Regular inspections: Inspect the pump regularly for any signs of wear and tear. Look for cracks, leaks, or loose parts. If you find any issues, address them promptly.
Conclusion
Calibrating an Oil-free Vacuum Pump is an important process that ensures the pump is working at its best. By following the steps outlined in this blog, you can calibrate your pump accurately and keep it in good condition. If you have any questions or need further assistance, don't hesitate to reach out. As a supplier of Oil-free Vacuum Pumps, we're here to help you get the most out of your equipment. If you're in the market for a new pump or need to replace some parts, feel free to contact us for more information and to start a procurement discussion.
References
- Manufacturer's manuals for Oil-free Vacuum Pumps
- Industry standards for vacuum pump calibration